

Avalanche Everest Testnet
Add to Watchlist
Added to Watchlist
Reward pool
6,000 AVA points
AVA
Expected profit
up to 6,000 AVA points
AVA
Max participants
∞
No limit
DropsEarn score
High
Hard, Low Risks

More information
About Avalanche
Avalanche is an open-source platform for launching decentralized finance applications and enterprise blockchain deployments in one interoperable, highly scalable ecosystem. Developers who build on Avalanche can easily create powerful, reliable, and secure applications and custom blockchain networks with complex rulesets or build on existing private or public subnets.
Everest will not show token balances for the Avalanche Token (AVAX) sale participants, grant recipients, or testnet rewards.
In addition to substantial security and performance improvements, the following features are now incorporated for users to test and use:
- Enhanced smart contract utility: Upgraded Avalanche Virtual Machine to support AVAX asset movement between all chains on the default subnet, including transfers between Avalanche’s default asset chain (X-Chain) and its Ethereum Virtual Machine implementation (C-Chain).
- Non-fungible token (NFT) support: Full support for the creation, transacting, and wallet custody for NFTs.
- Networking updates: Introduced adaptive timeouts to learn current network delays, enabling liveness during periods of larger delays, and enhanced DDoS protection to improve both network resilience and bootstrapping time.
- Bech32 addresses: Implements Bech32 address format for more easily read formatting and to reduce the possibility of user errors.
- Fees: Implements fees for transactions and activity across the network.
- UTXOs for Platform Chain: Converted from account-based model to UTXO-based model to enable pruning functionality.
- End-to-end testing & network monitoring: Added support for end-to-end testing suite, and additional metrics for database and network monitoring.
- Memos: Introducing a memo field for transactions, to ensure they are sent to the right account within shared wallets like those used by custodians and exchanges to receive user funds.
More details on the release are available on Github.
With all of the exciting improvements being rolled out with Everest, developers currently building decentralized solutions, on networks such as Ethereum, will be able to enjoy these new improvements without needing to learn additional coding languages or change much of their current workflow.
Avalanche’s C-Chain is compatible with all of the key Ethereum tooling that has fueled decentralized finance’s (DeFi’s) growth to-date, including MetaMask, Web3.js, Remix, Truffle Suite, and Embark Platform. So current Ethereum applications can easily try Avalanche–Solidity works out of the box!
Avalanche features high-throughput (~5,000tps), fast finality (less than 2 seconds), and high resilience. In our recent incentivized testnet, Denali, we had over 1,000 full, block-producing validators participating in consensus.
How to join
Stage 1 - Installing and Running Avalanche
Avalanche’s Gecko client has been tested to work with the following operating systems:
- Ubuntu 18.04 and 20.04
- OSX Catalina or higher
Minimum hardware requirements:
- CPU: 2 GHz
- RAM: 3 GB
- Storage: 250 MB free space
- The binaries are only compiled for x64, requires building from source yourself to make it work on other architectures
Recommended hardware:
- CPU: > 2 GHz
- RAM: > 3 GB
- Storage: > 5 GB free space on SSD
- The binaries are only compiled for x64, requires building from source yourself to make it work on other architectures
For the purpose of this tutorial, a utility called curl is used to make the API calls. Alternative options such as the tool Postman are also commonly used to make API calls on the Avalanche network, however. While not a Gecko requirement, it is suggested to install this utility on your operating system to go through the tutorial verbatim.
- Download the latest Everest tar.gz (zip for osx) found here: https://github.com/ava-labs/gecko/releases
- Unpack into a folder of our choosing:
- * Linux:
tar -xvf avalanche-linux-<VERSION>.tar.gz - * OSX:
unzip avalanche-osx-<VERSION>.zip cd avalanche-<VERSION>
Once we have extracted the files into a folder of our choosing, we simply need to open the directory in a command-line terminal, and type:
> ./avalanche
Stage 2 - Staking Avalanche
To become a validator in the Avalanche network, one must first stake AVAX to the platform. For Everest, minimum staking amount is 5,000,000 nAVAX (nano-AVAX). This amount will not be the same as on Mainnet, but we set this threshold to a very reasonable amount to encourage as many enthusiasts to become validators.
The Avalanche platform currently employs basic RPC primitives to get work done. These types of primitives help users build transactions, sign transactions, send transactions, and maintain the node. In the future, these primitives will be abstracted on further to assist with basic duties, but for Everest we’re making sure these building blocks are functioning as expected.
Step 1 - Create a User and Addresses
In order to become a validator, a user must be created. The following API call will create a user with the username and password we specify.
curl -X POST --data '{
     "jsonrpc": "2.0",
     "id": 1,
     "method": "keystore.createUser",
     "params": {
         "username": "YOUR USERNAME",
         "password": "YOUR PASSWORD"
    }
}' -H 'content-type:application/json;' 127.0.0.1:9650/ext/keystore
Now that we have an account, we need to create an address on the X-Chain. This address will receive AVAX from the faucet
curl -X POST --data '{
    "jsonrpc":"2.0",
    "id"     :1,
    "method" :"avm.createAddress",
    "params" :{
        "username": "YOUR USERNAME",
        "password": "YOUR PASSWORD"
    }
}' -H 'content-type:application/json;' 127.0.0.1:9650/ext/bc/X
This will return a response as follows, which contains the address we just created. We’ll need to jot down our X-Chain address as we’ll use it in later steps.
{
    "jsonrpc": "2.0",
    "result": {
        "address": "YOUR X-CHAIN ADDRESS"
    },
    "id": 1
}
We also must create an address on the P-Chain using our user.
curl -X POST --data '{
    "jsonrpc": "2.0",
    "method": "platform.createAddress",
    "params": {
        "username": "YOUR USERNAME",
        "password": "YOUR PASSWORD"
    },
    "id": 1
}' -H 'content-type:application/json;' 127.0.0.1:9650/ext/P
This returns the P-Chain account. We must jot this down as well, since we’ll use it in later steps.
{
    "jsonrpc": "2.0",
    "result": {
        "address": "YOUR P-CHAIN ADDRESS"
    },
    "id": 1
}
Step 2 - Acquire Funds
Now they have some accounts, let’s put some funds in them. To start, we’re going to get some funds from the Avalanche Testnet Faucet. They put our X-Chain address into the form, confirm we’re human, and request 10,000,000 nAVAX (nano-AVAX).
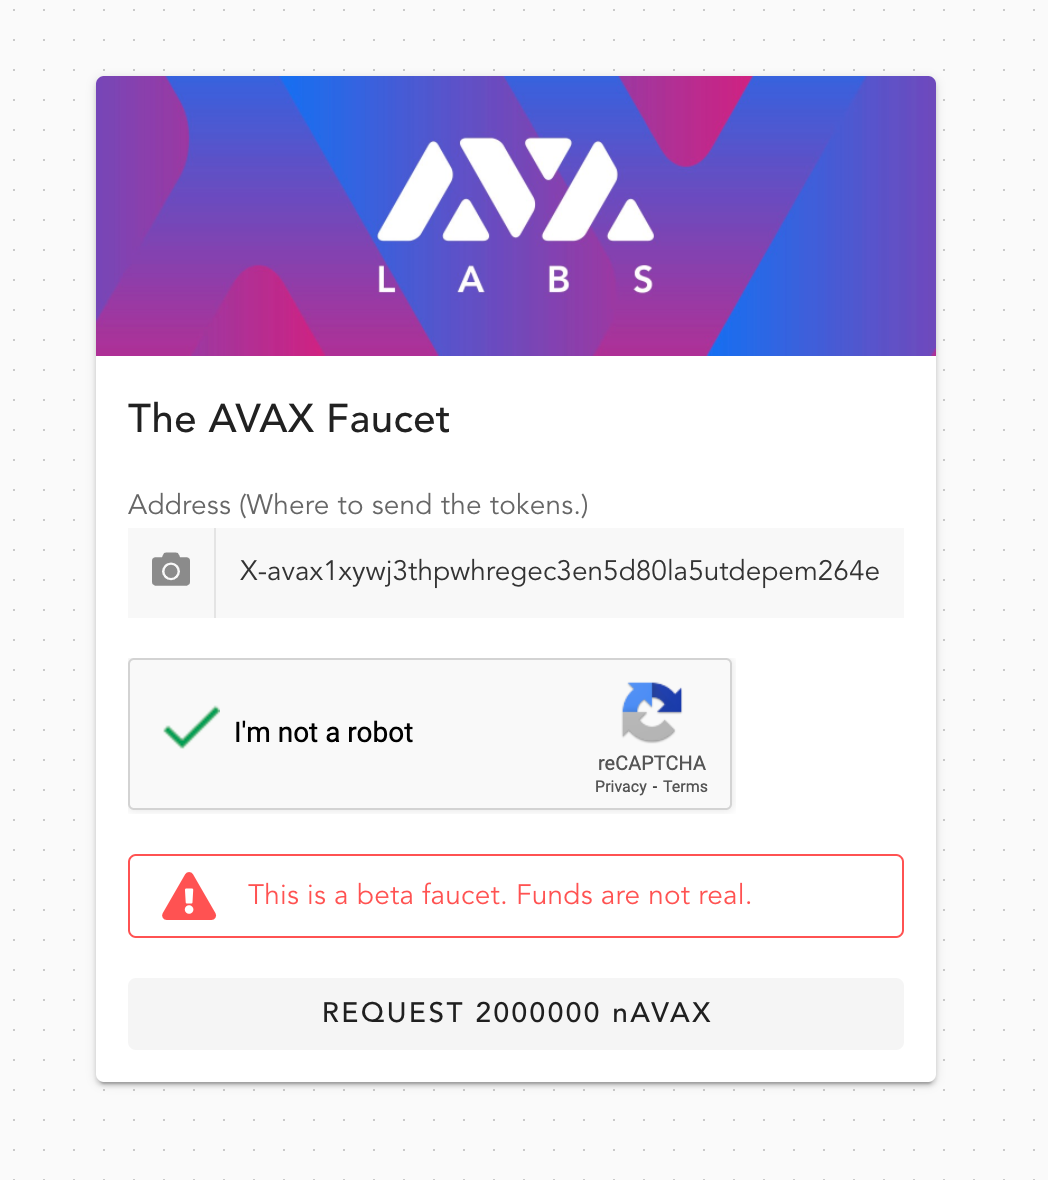
These funds should arrive in under 2 seconds. To verify that the funds are in our address, call the following function, replacing “YOUR X-CHAIN ADDRESS HERE” with the X-Chain address provided to the faucet.
curl -X POST --data '{
    "jsonrpc":"2.0",
    "id"     :1,
    "method" :"avm.getBalance",
    "params" :{
        "address":"YOUR X-CHAIN ADDRESS HERE",
        "assetID"  :"AVAX"
    }
}' -H 'content-type:application/json;' 127.0.0.1:9650/ext/bc/X
We will see the following response, confirming that we have received our AVAX.
{
    "jsonrpc": "2.0",
    "result": {
        "balance": "10000000",
        "utxoIDs": [
            {
                "txID": "ZckGnBciWaRyDXiYcs9igvXjyMZH28cSrDVvpkBteHxhYEA3Z",
                "outputIndex": 0
            }
        ]
    },
    "id": 1
}
Step 3 - Send it to the Platform
We’re funded! Now time to do something with it. To do this, we’re going to put AVAX from our X-Chain onto our P-Chain. The P-Chain controls all staker accounts and validator sets. It is where platform coordination occurs, and like the X-Chain, it is run by default across all nodes on the AVAX platform.
The API call “exportAVAX” begins a procedure on the local node to sign a transaction that can, in one step, transfer funds from the X-Chain to the P-Chain across the network. This is an atomic swap and every node will conduct it. Be sure to use the P-Chain address created in Step 1, not the X-Chain address. We’re going to send the Everest minimum staking amount — 5,000,000 nAVAX — to the P-Chain so that we can validate on the network. We also want to include an additional 2,000,000 nAVAX to pay for 2 transaction fees—the first is to import the funds to the P-Chain and the second is to add our node as a validator.
curl -X POST --data '{
    "jsonrpc":"2.0",
    "id"     :1,
    "method" :"avm.exportAVAX",
    "params" :{
        "username": "YOUR USERNAME",
        "password": "YOUR PASSWORD",
        "to":"YOUR PLATFORM ADDRESS HERE",
        "amount": 7000000
    }
}' -H 'content-type:application/json;' 127.0.0.1:9650/ext/bc/X
This will return a TxID in the response. We do not need to retain this TxID and it can be ignored.
The next step is to accept this transfer on the P-Chain. To do this, we must pass our P-Chain address to the “importAVAX” method on the P-Chain. We also pass in a “sourceChain” which is the ID or alias of the chain the AVAX is being imported from. To import funds from the X-Chain, use "X".
curl -X POST --data '{
    "jsonrpc": "2.0",
    "method": "platform.importAVAX",
    "params": {
        "username": "YOUR USERNAME",
        "password": "YOUR PASSWORD",
        "to":"YOUR PLATFORM ADDRESS HERE",
        "sourceChain": "X"
},
    "id": 1
}' -H 'content-type:application/json;' 127.0.0.1:9650/ext/bc/P
This will return a TxID in the response. We do not need to retain this TxID and it can be ignored.
That should be it! The P-Chain should have sufficient funds to stake and participate as a validator in the Everest testnet. To verify, we call getBalance on the P-Chain and verify the balance.
curl -X POST --data '{
    "jsonrpc": "2.0",
    "method": "platform.getBalance",
    "params":{
        "address":"YOUR PLATFORM ADDRESS HERE"
    },
    "id": 1
}' -H 'content-type:application/json;' 127.0.0.1:9650/ext/bc/P
Stage 3 - Validation
Now that we have funds on the P-Chain, we’re ready to register to become a validator on the network. Each node has a “nodeID” which is used to uniquely identify the node on the network. In order to become a validator, we need to commit this nodeID to be the node that does the work. The first thing to do, is to get our nodeID and jot it down so we can use it later.
curl -X POST --data '{
    "jsonrpc": "2.0",
    "method": "info.getNodeID",
    "params":{},
    "id": 1
}' -H 'content-type:application/json;' 127.0.0.1:9650/ext/info
The next step is to build a transaction that adds our nodeID to the network. In the below example, we’re putting a start time of 15 minutes from now, and we’re ending on August 15th, 2021.
- Note: on OSX, you should use “$(gdate” instead of “$(date”. If you do not have “gdate” installed, execute “brew install coreutils” in your terminal.
curl -X POST --data '{
    "jsonrpc": "2.0",
    "method": "platform.addDefaultSubnetValidator",
    "params": {
        "username":"YOUR USERNAME HERE",
        "password":"YOUR PASSWORD HERE",
        "nodeID":"YOUR NODEID HERE",
        "rewardAddress":"YOUR PLATFORM ADDRESS HERE",
        "startTime":'$(date --date="15 minutes" +%s)',
        "endTime":1629032852,
        "stakeAmount":5000000,
        "delegationFeeRate":0
    },
    "id": 1
}' -H 'content-type:application/json;' 127.0.0.1:9650/ext/P
This will return a TxID in the response. We do not need to retain this TxID and it can be ignored. And that should be that! We should see ourselves in the list of pending validators now, and in 15 minutes we’ll be in the list of current validators!
curl -X POST --data '{
    "jsonrpc": "2.0",
    "method": "platform.getPendingValidators",
    "params": {},
    "id": 4
}' -H 'content-type:application/json;' 127.0.0.1:9650/ext/Pcurl -X POST --data '{
    "jsonrpc": "2.0",
    "method": "platform.getCurrentValidators",
    "params": {},
    "id": 1
}' -H 'content-type:application/json;' 127.0.0.1:9650/ext/P
Steps:
- Day 1: Run your node and start to validate Everest (English tutorial), at the end create your Tweet, use the hashtags #AVAX and #Avalanche4Everest. Write at least a sentence in your tweet! Include a screenshot of your running node. Make sure to do not show publicly your private information in your screenshot (personal info, ip address, .....).
- Day 2: Transfer some funds in this public address (X-everest1y9lem3hg7yam4wa7rxc5k5ft565s8y74wr27nd), it is from Giuseppe! Please have a look in the quickstarter to find the right API you have to use to send some AVAX.
- Day 3: Transfer some funds in this public address (X-everest1wczcx0lp8p2ksllwkpvy5wfxda2g8mflce9had), it is from Yusuf! Please have a look in the quickstarter to find the right API you have to use to send some AVAX.
- Day 4: Transfer again some funds to one of the previous addresses, it's your choice, Giuseppe or Yusuf? At the end create your Tweet, use the hashtags #AVAX and #Avalanche4Everest. Write at least a sentence in your tweet! Include a screenshot. Make sure to do not show publicly your private information in your screenshot (personal info, ip address, .....). Please have a look in the quickstarter to find the right API you have to use to send some AVAX.
- Day 5: Free choice sub-task! Create a new asset, transfer it, ....... + Tweet about your choice! Use the hashtags #AVAX and #Avalanche4Everest. Write at least a sentence in your tweet! Include a screenshot. Make sure to do not show publicly your private information in your screenshot (personal info, ip address, .....).
Pay attention, at the end of this campaign, whoever raises more funds between Giuseppe and Yusuf, will buy the space shuttle for the Hub community. Free ticket for everyone.
How to submit
- Day 1: your nodeID + link of your tweet
- Day 2: TX ID
- Day 3: TX ID
- Day 4: TX ID + link of your tweet
- Day 5: Submit what can be useful to proof your choice + link of your tweet
Rewards:
- Entry point reward for Day 1: 1500 Avalanche points + 0.04 reputation
- Day 2: 600 Avalanche points + 0.01 reputation
- Day 3: 600 Avalanche points + 0.01 reputation
- Day 4: 1000 Avalanche points + 0.01 reputation
- Day 5: 1000 Avalanche points + 0.01 reputation
Additional 1300 Avalanche points + 0.02 reputation for completing everything.
About
The Avalanche Mainnet release candidate: Everest–a fully-featured version of the Avalanche network that will act as the final phase of testing before the launch of Avalanche’s mainnet.
Activity Type
Date
21 Aug 2020 12:00(UTC+3) - 30 Aug 2020 12:00(UTC+3)
Registration
Closed
When Reward:
None
Event Status